2023
I couldn’t find this anywhere else, so I just measured it myself. The WD Elements 10TB in its external enclosure pulls 9.7W when idle, 18W at startup.
2022
I was researching how to monitor systemd services using Grafana/Prometheus when I came across this article. I learned systemd monitoring comes pre-loaded with node_exporter and just needs to be enabled. Then I discovered the Ansible role I use already enables it for me. Neat! No work to do. Or so I thought. Punching node_systemd_unit_state{instance="192.168.1.8:9100"} into Prometheus did not show user services, units that would be shown by systemctl --user. Turns out node_exporter only collects for root. systemd monitoring for USER services I found the community collector systemd_exporter which has this capability, although it isn’t documented anywhere. It’s a completely different binary than node_exporter, and thus has to be installed and enabled. Follow the install instructions or use the cloudalchemy/ansible-systemd-exporter Ansible role. The role starts another root systemd exporter, which is not what we’re interested in. After installing the binary, set up yet-one-more systemd service in ~/.config/systemd/user/systemd_exporter.service which runs the same collector at a user level with some changes: Add --collector.user argument. Change the metrics port (I use 9559). Remove the User= and Group= lines from the [Service]. It should look something like this: ~/.config/systemd/user/systemd_exporter # # Ansible managed # [Unit] Description=Prometheus SystemD Exporter After=network-online.target [Service] Type=simple ExecStart=/usr/local/bin/systemd_exporter \ --collector.user \ --web.listen-address=0.0.0.0:9559 SyslogIdentifier=systemd_exporter Restart=always RestartSec=1 StartLimitInterval=0 [Install] WantedBy=multi-user.target For completeness, this is my install-systemd_exporter.yml ansible playbook: - hosts: all become: true roles: - cloudalchemy.systemd_exporter - hosts: all tasks: - name: Copy user systemd_exporter.service ansible.builtin.copy: src: ../../templates/systemd/systemd_exporter.service dest: ~/.config/systemd/user/systemd_exporter.service - name: Enable systemd_exporter.service ansible.builtin.systemd: daemon-reload: true enabled: true state: started name: systemd_exporter scope: user After running the playbook, or otherwise --user enable --now-ing systemd_exporter, I now have metrics on 0.0.0.0:9559 describing user services. Neat.
I recently exported a Zpool without first removing the corresponding sharenfs option. On the next reboot, exportfs attempted to share this directory from a pool which is no longer mounted (as it doesn't exist anymore).
I recently read this great article about docker image size, how it works, and why it matters. Up until now I hadn’t given any thought to the size of the containers I’m building. Dive is the cli tool I’m using to inspect each layer of the final docker container. I gave these quick changes a try, and am pretty astonished by the results: Before My Fetch Image Proxy project was the most recent offender so I started there. I was using FROM node:17 without any build step. This meant that npm libraries, and the overhead of a debian base was weighing the container to 1 GB in space! After Switching to a build step had the biggest impact, but using gcr.io/distroless/nodejs:16 distroless images for the runtime also made a slight difference. Both small changes combined brought the overall size to 124 MB, about an 8x reduction in disk space. I probably should have known this so far into my career with docker, but if I did I would not have had this fun tooling experience. This is the gcr template for nodejs: https://github.com/GoogleContainerTools/distroless/blob/main/examples/nodejs/Dockerfile
2021

Redeploying container images built in CI/CD to a Nomad cluster.
I try to self-host the software and services I use on a daily basis.

My custom Chromium patches, including GTK dark mode and an extension-less startpage that maintains its address bar focus.
2020
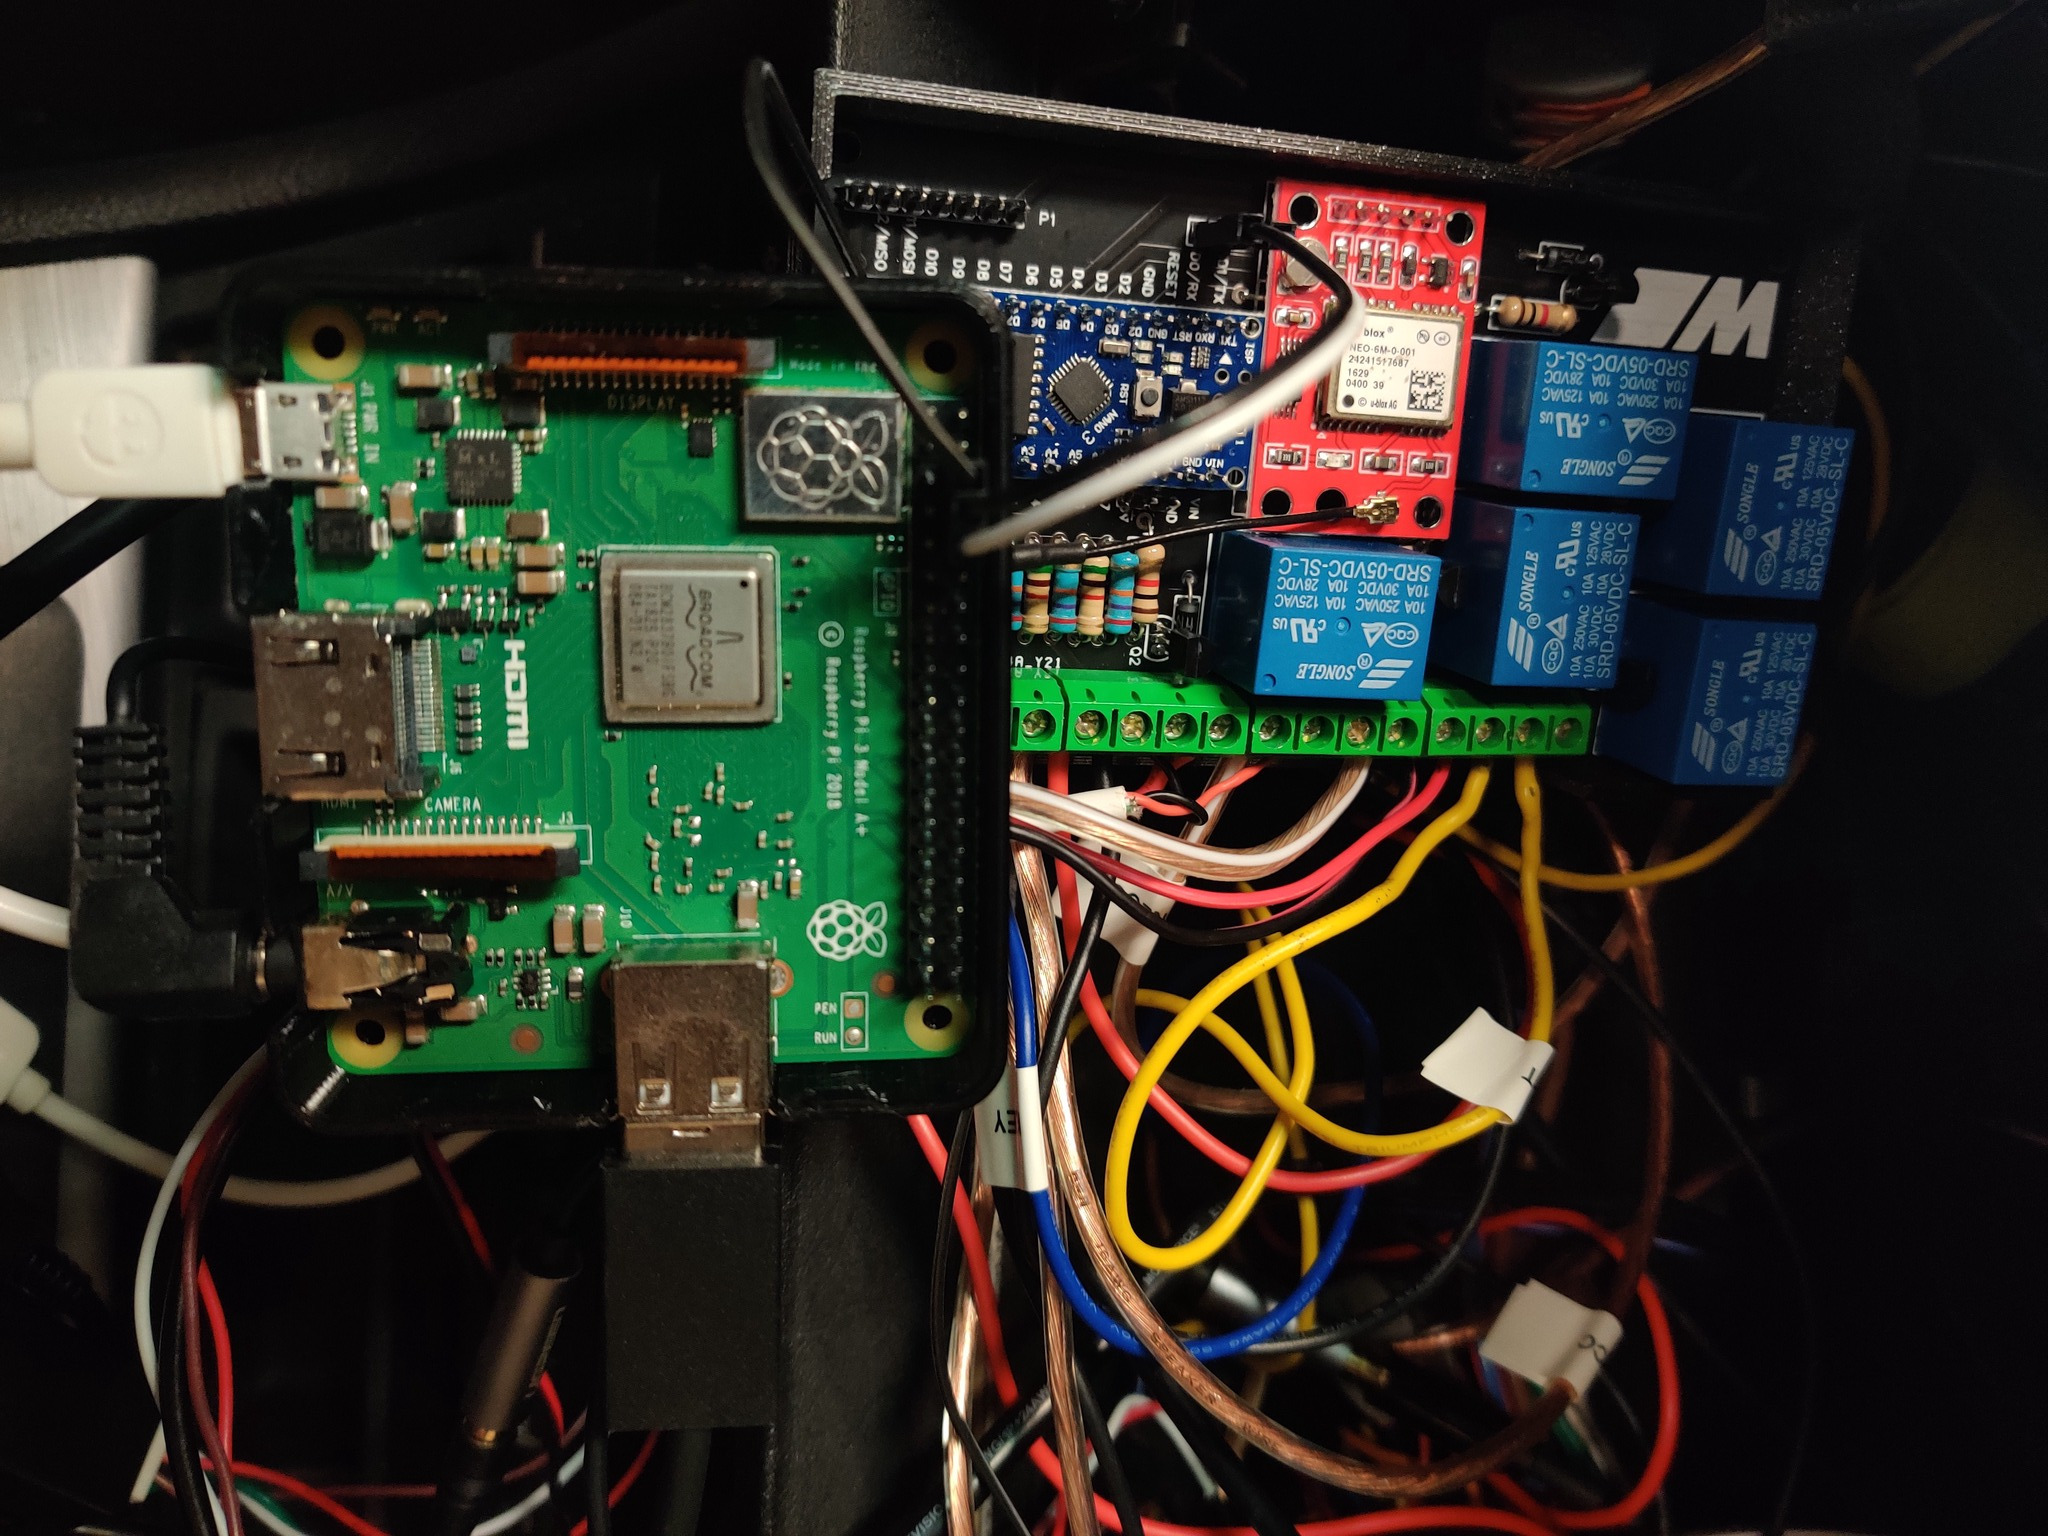
Modernizing my 2005 BMW by adding oodles of connectivity and custom electronics.
Intelligent aquarium light control utilizing a full stack of hardware, lower level C, and React Native mobile apps for a unique IoT solution.
Generate boot image from here: https://github.com/kholia/OSX-KVM With this as a guide for proxmox: https://manjaro.site/how-to-install-macos-big-sur-on-proxmox-ve/ GenSMBIOS, ProperTree, Hackintool are REQUIRED! Post Install Use Clover Configurator to mount EFI disk of root and OpenCore install disk. Copy OpenCore install disk EFI files to root efi. Open config.plist into GenSMBIOS, use the settings there. Use Hackintool to check that en0 is built-in. If not, use ProperTree to edit the plist as described here FIXME NSKeyedArchiver Notes
2019

I have OpenALPR running on this tiny machine, using two cameras mounted in the lower fog lights as its source.